Amazon EC2 Machine Learning GPU Setup
A few months ago I jumped into a Kaggle competition at the last minute. My laptop didn’t have enough memory to handle the data set. And, I wanted more CPUs to throw at the problem. So now I had a great excuse to get myself set up to use Amazon cloud computing.
Sign up for AWS Account
- If you haven’t already, register for an AWS account.
- Navigate to AWS services -> EC2.
- Find [Launch Instance] button and click it.
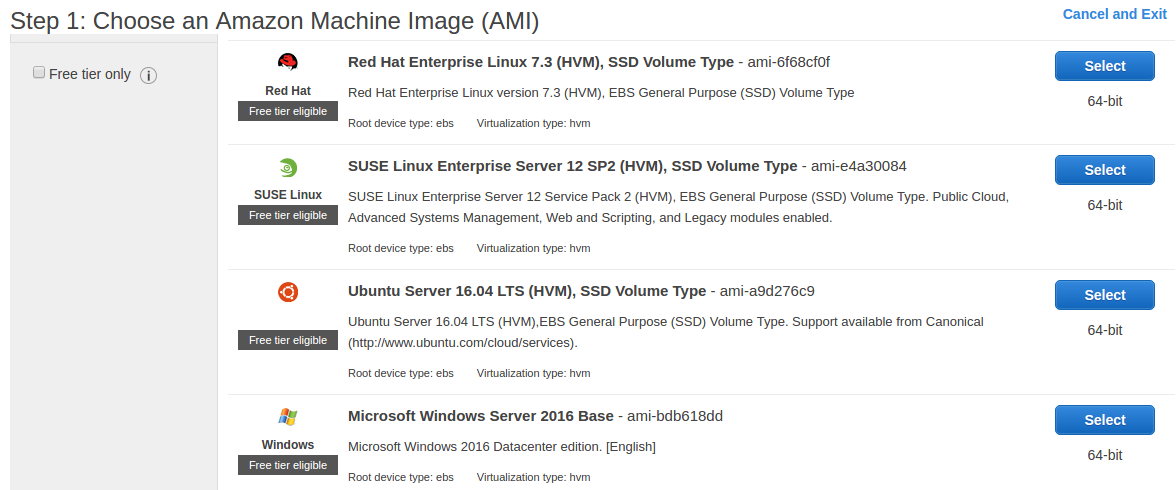
Select your Amazon Machine Image (AMI):
Select Unbuntu Server
Select Instance Type
We will select p2.xlarge instance. This is the lowest tier of GPU servers. Once everything is set up, the instance type can be quickly changed depending on the size of your job.
Configure Instance Details
You will get a screen similar to this:
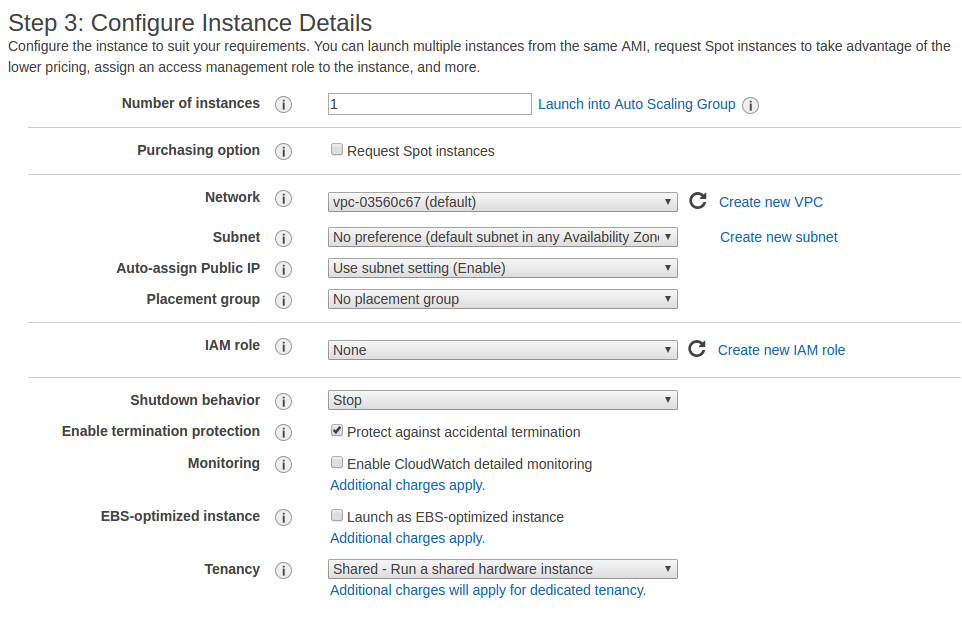
Here I have selected all the default options except I have selected Protect against accidental termination. (You want to stop your instance when you are done, not terminate it.)
EBS-optimized instances provide better data throughput to the SSD storage. You can optionally select this.
Add Storage
I am starting with 100GB of General Purpose SSD (GP2) storage. I have unclicked the Delete on Termination box - this is important. The alternative is to take a snapshot of your machine before terminating your instance. Or, mounting a drive with your software installations. These are manageable approaches, but a pain I think.
Note: This approach costs more money, because your storage is always set aside. The cost is on the order of $0.10/GB/month.
Configure Security Group
(Just click through Add Tags screen - not a feature I personally use.)
Configuring the security group is an important step for viewing a Jupyter Notebook and working interactively on your intance. Here is a screen shot of the settings you will need:
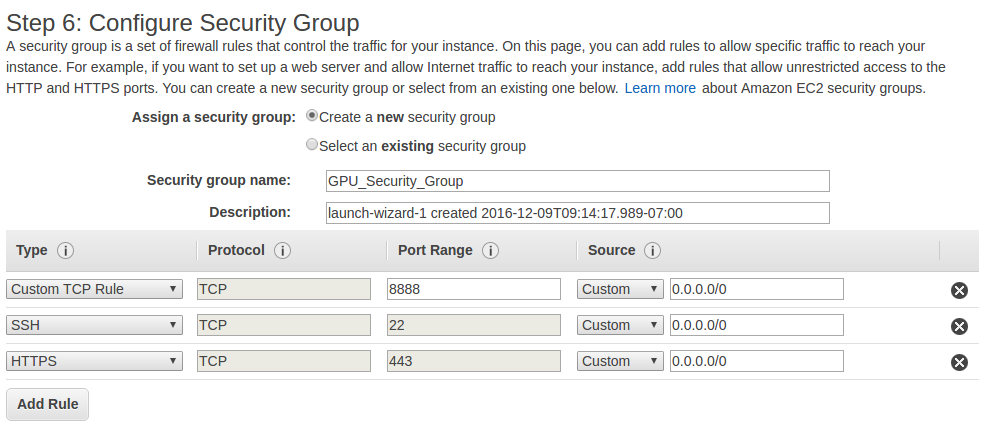
For extra security, you can set your instance to only accept traffic from your own IP address. The above setting (0.0.0.0/0) lets traffic in from any IP address. (Of course, SSH will have a security key. And your Jupyter Notebook sever can be password protected.)
Launch
Click the Review and Launch button. You will get a summary of your settings and likely a couple warnings:
- Your server is open for the world to see
- This instance type is not part of the free AWS tier
Click the Launch button.
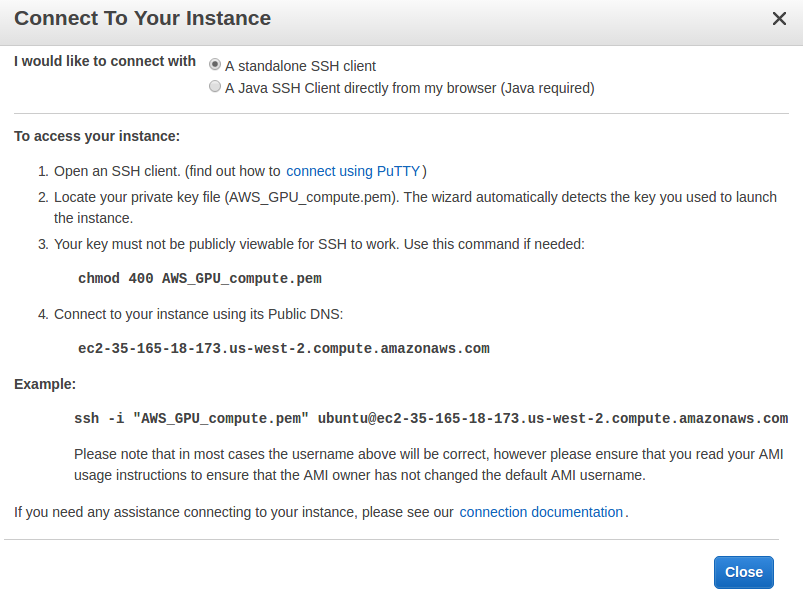
Before you can actually launch you need to set up a private key. This window will pop up:
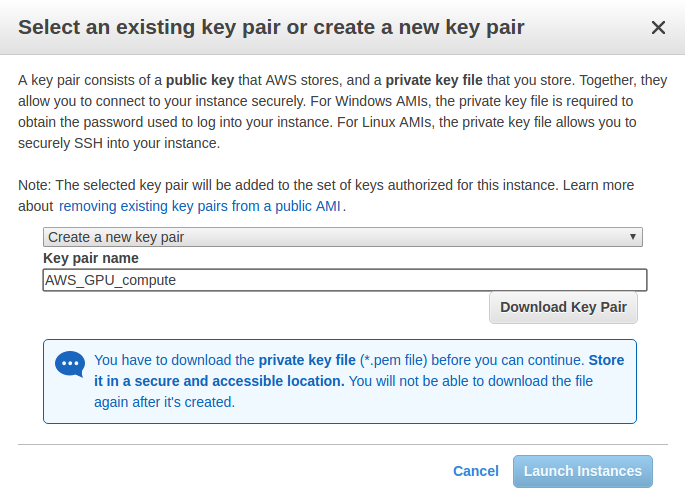
You can name your key file whatever you’d like. Then download it. I keep mine in my home directory since I usally launch ssh from there. You must make your security key (AWS_GPU_compute.pem or name you chose) root read-only:
$ chmod 400 AWS_GPU_compute.pemLog in to your Instance
You will get a screen like this:
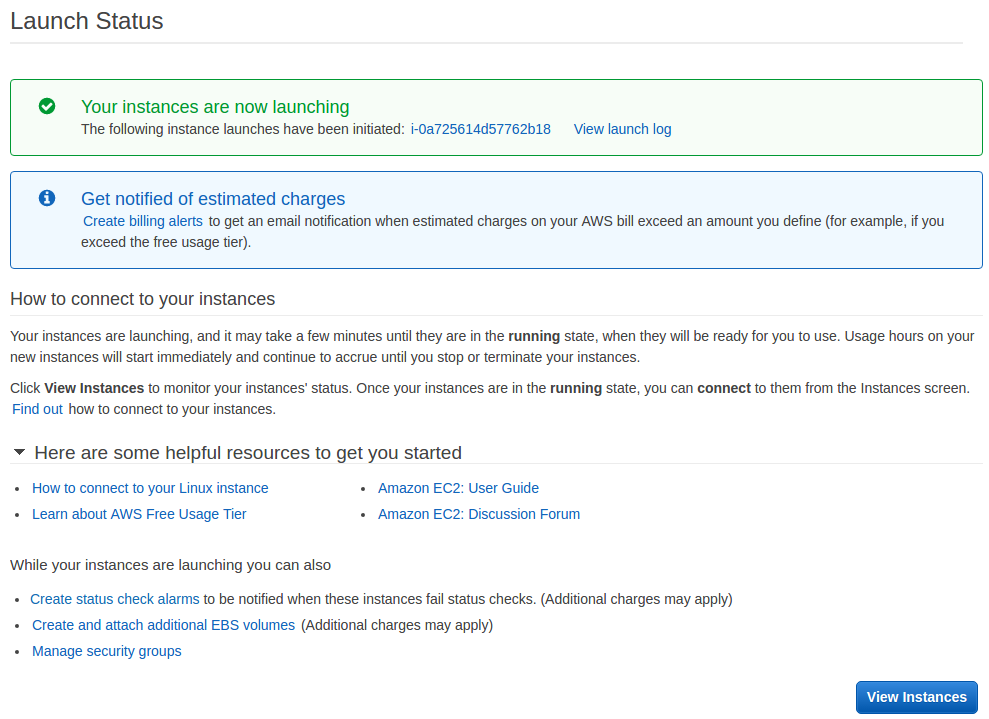
Scroll to the bottom-right and click View Instances. This will take you to your EC2 dashboard and you should see your instance with a green status bubble. Let’s SSH to the instance and make sure everything is working.
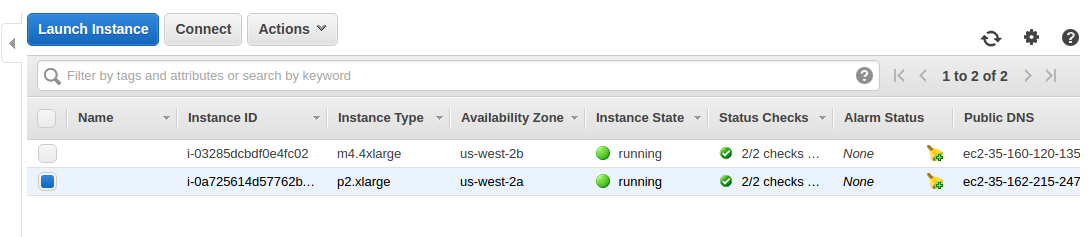
You will only see 1 instance (the screenshot above shows 2 instances). I have a different instance type that I use for miscellaneous jobs that I run remotely. Click the Connect button and you will get a handy link that you can cut&paste into your terminal to ssh to your instance. Something like this:
$ ssh -i "AWS_GPU_compute.pem" ubuntu@ec2-35-162-197-182.us-west-2.compute.amazonaws.comYou should get a prompt that looks something like this:
ubuntu@ip-172-31-20-90:~$ python3
Python 3.5.2 (default, Sep 10 2016, 08:21:44)
[GCC 5.4.0 20160609] on linux
Type "help", "copyright", "credits" or "license" for more information.
>>> print('Hello, World!')
Hello, World!
>>> quit()
Congratulations, but we better do something a bit more useful with the compute power now at our fingertips!
Install Machine Learning Software
$ sudo apt-get update
$ sudo apt-get install python3-pip
$ sudo -H pip3 install --upgrade pip
$ sudo apt-get install python3-numpy python3-scipy python3-matplotlib python3-pandas python3-nose
$ sudo apt-get install ipython3 ipython3-notebook
$ sudo -H pip3 install jupyter
$ sudo -H pip3 install scikit-learn
(You may ask, why not just install Anaconda? From what I can determine, the TensorFlow installation for Anaconda doesn’t provide GPU support. Plus, personally, I prefer a direct install of only the packages I use.)
Let’s get Jupyter Notebook up and running
Build config file, it will be put in ~/.jupyter/jupyter_notebook_config.py. This is where you will put your notebook password (to be generated next).
$ jupyter notebook --generate-config
Writing default config to: /home/ubuntu/.jupyter/jupyter_notebook_config.py
Open python and type following to generate password (this is the password you will use when you remotely log into your Jupyter Notebook - so remember it):
$ python3
Python 3.5.2 (default, Nov 17 2016, 17:05:23)
[GCC 5.4.0 20160609] on linux
Type "help", "copyright", "credits" or "license" for more information.
>>> from notebook.auth import passwd
>>> passwd()
Enter password:
Verify password:
'sha1:f6354de18ac3:39eblaha707435cblahgfe9a6dddedf67568da07'
>>> quit()Open~/.jupyter/jupyter_notebook_config.pyin a text editor in a new terminal session. We are going to make some edits
Cut the ‘sha1: …’ string (from above Python session) to a clipboard and paste it here in thejupyter_notebook_config.pyfile. Also, uncomment the line:
c.NotebookApp.password = 'sha: ...'Add this line below the first comment block in the jupyter_notebook_config.py file:
c = get_config()Generate a SSL web certificate (Answer the questions the best you can - not critical):
$ cd ~/.jupyter
$ openssl req -x509 -nodes -days 365 -newkey rsa:1024 -keyout mykey.key -out mycert.pem
Update these lines in jupyter_notebook_config.py file (again, uncommenting):
c.NotebookApp.ip = '*'
c.NotebookApp.port = 8888
c.NotebookApp.open_browser = False
c.NotebookApp.certfile = '/home/ubuntu/.jupyter/mycert.pem'
c.NotebookApp.keyfile = '/home/ubuntu/.jupyter/mykey.key'
Finally, a couple quick commands to polish off Jupyter install:
$ sudo -H pip3 install ipywidgets
$ sudo jupyter nbextension enable --py --sys-prefix widgetsnbextension
Fire up a Notebook!
$ jupyter notebookThen connect to it by grabbing your Public DNS from your AWS web console. Select the instance from the console, and click the big Connect button above. Cut and paste the Public DNS address from this pop-up:
Put ahttps://at the front and a:8888at the end. For example:
https://ec2-35-165-18-173.us-west-2.compute.amazonaws.com:8888
You’ll get a warning about an unsigned certificate (you know, the one you generated a few steps earlier). You can safely ignore this (usually by clicking on advanced option in your browser window). Then you’ll see the password page of your Jupyter notebook. Enter the password you generated earlier and you are in.
Do a quick check, perhaps import numpy as np and generate a random array and print it.
Install TensorFlow and Keras
For this section and the next, your best bet is to go to the TensorFlow installation site. Their directions are excellent, and will stay up-to-date. But, I’ve distilled them to the essence here:
$ sudo -H pip3 install keras
$ sudo -H pip3 install tensorflow
$ export TF_BINARY_URL=https://storage.googleapis.com/tensorflow/linux/gpu/tensorflow_gpu-0.12.0rc0-cp35-cp35m-linux_x86_64.whl
$ sudo -H pip3 install --upgrade $TF_BINARY_URL
Install CUDA
You need to download 2 items from nVidia so TensorFlow can use the GPU.
- CUDA Toolkit v8
- cuDNN - GPU-accelerator for deep neural networks - registration required
(You have to browse to the download links. One nice method of grabbing a link as a curl command is shown here. This way you can download directly to your AWS instance.)
$ # filenames will change as versions update
$ sudo dpkg -i cuda-repo-ubuntu1604-8-0-local-ga2_8.0.61-1_amd64.deb
$ sudo apt-get update
$ sudo apt-get install cuda
$ #
$ # instructions recommend reboot here
$ # choose reboot action from AWS control panel
$ #
$ tar xvzf cudnn-8.0-linux-x64-v5.1-ga.tgz
$ sudo cp -P cuda/include/cudnn.h /usr/local/cuda/include
$ sudo cp -P cuda/lib64/libcudnn* /usr/local/cuda/lib64
$ sudo chmod a+r /usr/local/cuda/include/cudnn.h /usr/local/cuda/lib64/libcudnn*
Add this to end of your .bashrc:
export LD_LIBRARY_PATH="$LD_LIBRARY_PATH:/usr/local/cuda/lib64:/usr/local/cuda/extras/CUPTI/lib64"
export CUDA_HOME=/usr/local/cuda
Finally, add this to your /etc/ssh/ssh_config file (this sends a “ping” every 2 minutes to keep your ssh connection alive):
# Fix port 20 Broken Pipe issue.
ServerAliveInterval 120
Test the Installation
Open a new terminal, connect to your AWS instance. TensorFlow comes with a convolutional NN example for the MNIST problem. Let’s run that:
$ python3 /usr/local/lib/python3.5/dist-packages/tensorflow/models/image/mnist/convolutional.py
.
.
.
name: Tesla K80
major: 3 minor: 7 memoryClockRate (GHz) 0.8235
pciBusID 0000:00:1e.0
Total memory: 11.17GiB
Free memory: 11.11GiB
.
.
.
Step 8500 (epoch 9.89), 11.2 ms
Minibatch loss: 1.609, learning rate: 0.006302
Minibatch error: 0.0%
Validation error: 0.8%
Test error: 0.8%
At the beginning of the example run, you will see messages about CUDA libraries being load. Then, more exciting, the GPU is found. And, finally the NN trains very quickly and achieves better than 99% accuracy on the test set.
Done!
I hope you made it this far. I love being able to launch instance(s) with as many CPUs or GPUs as I want. Now you can run multiple large jobs in parallel and monitor their progress using a Juypter Python Notebook.
Important Reminder: When you are done, STOP your instance using the AWS dashboard. Otherwise you will rack up charges ($$$). It is important you choose STOP and NOT terminate. If you terminate your instance, you will lose all the data on your SSD. It is also good practice to save an image of your instance from time to time.
If any of the instructions above are confusing or just plain wrong, please post a comment below. Suggestions for improvements also welcome.